A starter kit for kumiko.
Kumiko is the lattice of thin wood slivers behind the paper of a shoji screen1 — and almost all of it is shaped by hand.4 You don't need a wall of exotic tools to start; you need a small, accurate set and good stock. Here's what actually sits on the bench, why each piece earns its place, and where to find one — drawn from a traditional shoji-making manual and cited throughout.
A note on the links. The “Find on Amazon” links below are plain product searches. I am not an Amazon affiliate and I earn nothing if you buy through them. They are there so you can find the tool, nothing else.
Two of these we make ourselves.
Every kumiko joint is pared to an exact angle, and traditionally the slivers are held in a dedicated kumiko jig while you work.7 That's precisely what we design and 3D-print — so you can begin with ordinary tools and let the jig hold the geometry. Start here before you spend on anything else — or, if you'd rather build one yourself, follow our guide to making a wooden kumiko jig.
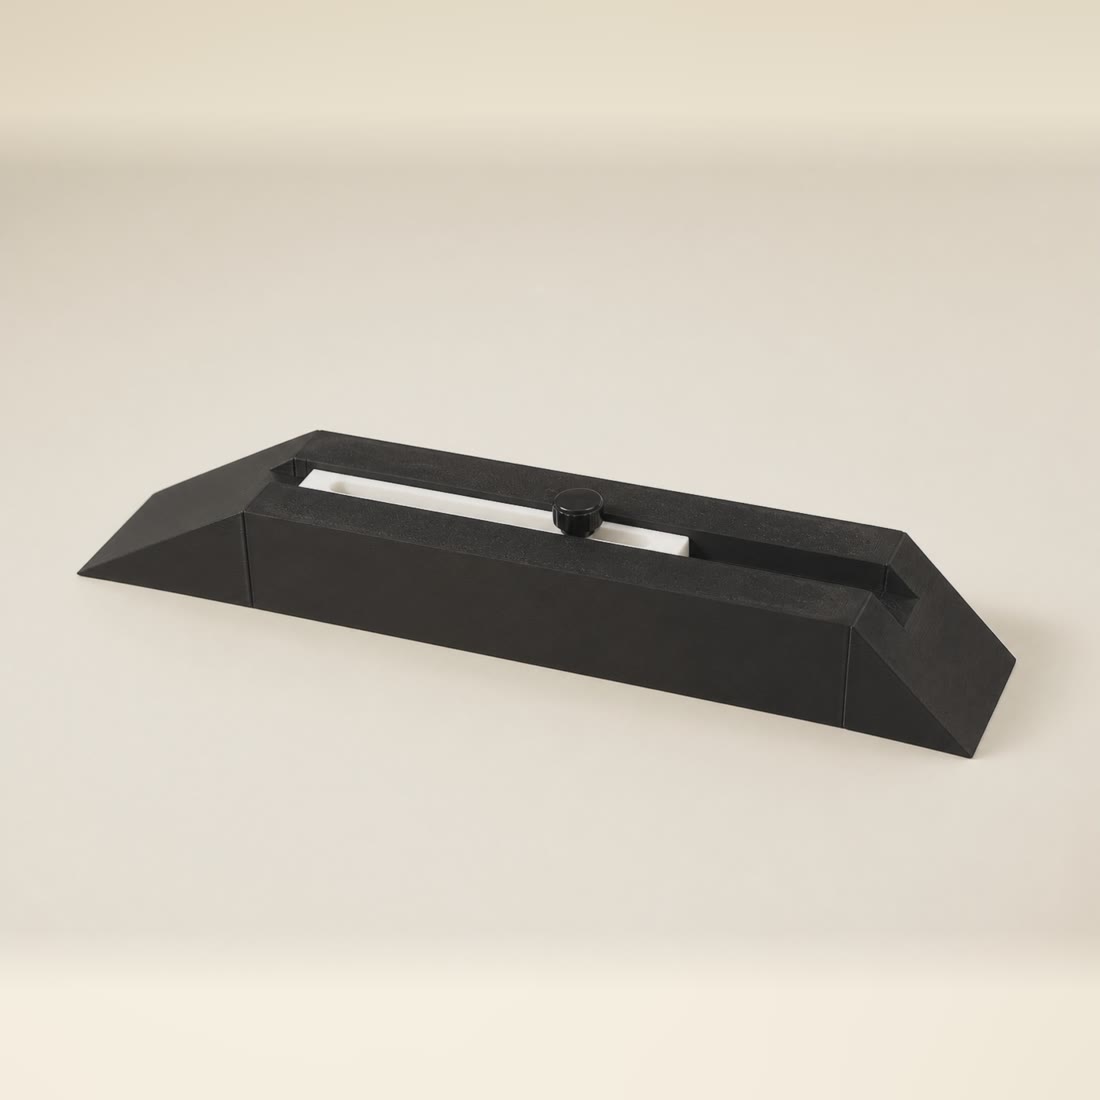
Custom Paring Jig
Dial a paring jig to your exact stock and angle in live 3D. It holds each sliver so the cut is repeatable — the single biggest shortcut into the craft.
Customise a jig →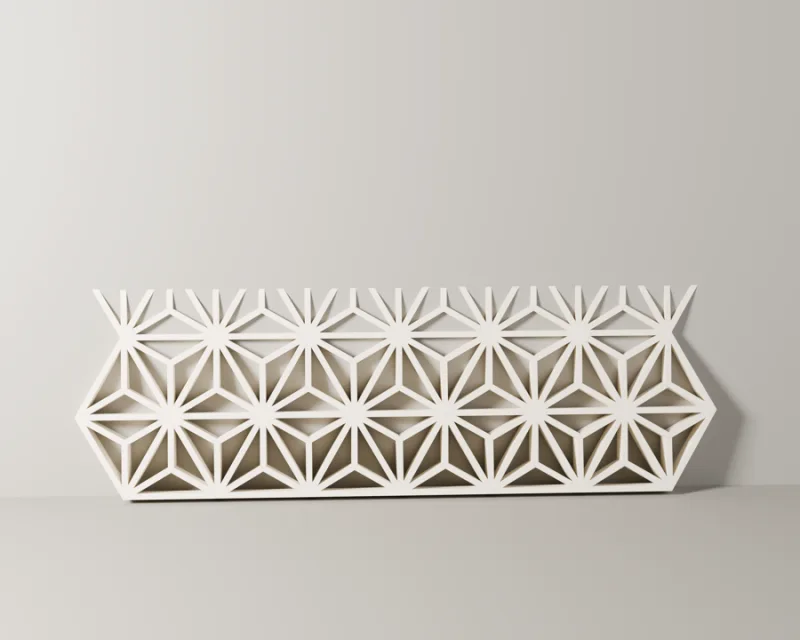
Pattern Studio
Compose a lattice on a true triangular grid, stamp classic patterns or draw your own, then export a 1:1 SVG to mark up at the bench.
Open the studio →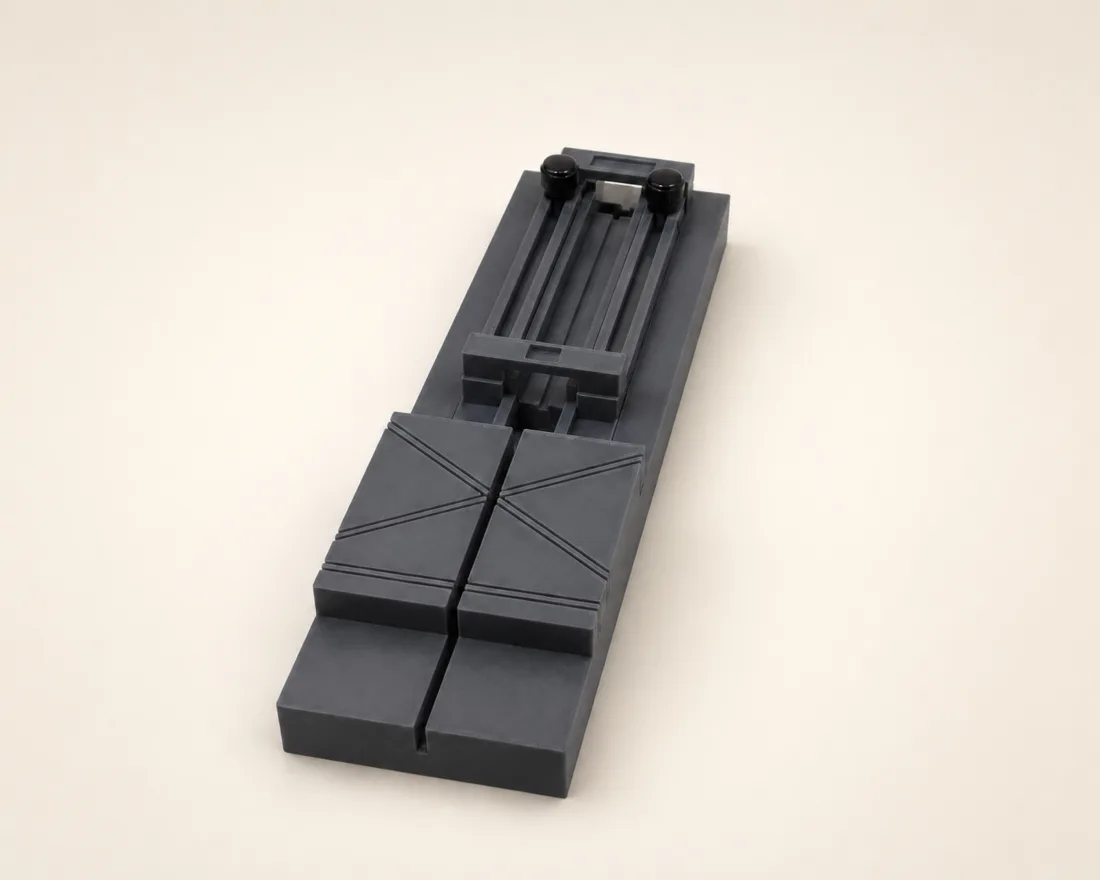
Cutting & sanding jigs
Cutting Station, Cross jig, Parts-Master and more — the printed jigs that hold the angle so your saw and plane don't have to guess.
See every jig →Layout & marking
Kumiko lives or dies on accurate marking — the manual calculates every kumiko by pitch, so a square that's truly square and a knife that scores a crisp line matter more than anything else.4
-
Steel rule / straightedgeFind on Amazon
A stiff, machined edge for stepping off dimensions and guiding the knife.4
-
Metal try square90°Find on Amazon
For 90° marking; the manual insists it be solid and dead accurate.4
-
Miter square45°Find on Amazon
For the 45° shoulders on rails and joints — again, must be solid and accurate.4
-
Marking knifeFind on Amazon
Scores a clean line the saw and chisel can drop into — far finer than a pencil for joinery.4
-
Marking gauge毛引き · kebikiFind on Amazon
Gauges a repeatable line down each piece; the kebiki is the Japanese marking gauge.10
-
Digital calipersFind on Amazon
Kumiko mitsuke is often 6.4 mm — you'll want to read stock to a tenth.4
-
Compasses & a 2B pencilFind on Amazon
Dividers for stepping off equal intervals, and a soft pencil for layout that wipes clean.4
Planes鉋 · kanna
The kanna is the Japanese plane, pulled rather than pushed.10 Traditionally a shoji is finished straight off the plane — no sanding, no varnish — so a plane that leaves a clean surface is the goal.3 Good Western planes work too; the manual says there's no need to buy the full Japanese set.4
-
Smoothing plane平鉋 · hira-gannaFind on Amazon
The everyday plane (~70 mm) for truing faces and the final finishing pass.4
-
Chamfer plane面取り鉋 · kakumen-gannaMakes it easierFind on Amazon
One of two tools the author marks as worth buying in the Japanese version for its accuracy on the little chamfers.5
-
Shoulder / rabbet plane際鉋 · kiwa-gannaFind on Amazon
Cleans right into a corner — used left and right; a shoulder plane is the Western equivalent.4
-
Small block plane小鉋 · ko-gannaFind on Amazon
A ~42 mm plane (or a low-angle block plane) for the small, fiddly work.4
Saws鋸 · nokogiri
A dōzuki is a Japanese saw with a stiff metal spine along the back, so the thin blade tracks a very fine, straight cut.6 The fine-tooth dōzuki is what cuts the kumiko joints, and it's the second tool the author marks as worth the Japanese version.5
-
Fine-tooth crosscut dōzuki胴付き · the kumiko sawMakes it easierFind on Amazon
Cuts the joints in the kumiko; the finer the cut, the tighter the lattice.5
-
Crosscut & rip dōzukiFind on Amazon
A ~240 mm crosscut and ~210 mm rip dōzuki for general sizing (Western equivalents are fine).4
-
Ryōba両刃 · optionalFind on Amazon
A double-edged saw — crosscut teeth on one side, rip on the other — if you prefer one saw for both.4
Chisels鑿 · nomi
A small run of butt chisels handles nearly all the paring. The manual's set is just four widths — Japanese or Western both work.7
-
Butt chisels追入鑿 · ōire nomiFind on Amazon
3, 6, 9 and 19 mm covers the frame joinery and the kumiko half-laps.7
-
Mortise-bottom chisel底浚い鑿 · sokosarai nomiFind on Amazon
Cleans the waste from the bottom of a mortise — handy, but the manual calls it non-essential.7
-
Sharpening stonesFind on Amazon
A hand-plane finish is only as good as the edge — waterstones keep the blade keen.4
Glue-up & papering
The kumiko is clamped into its jig, glued, then the screen is papered and trimmed.7 None of this needs anything exotic.
-
Bar clamps端金 · hataganeFind on Amazon
Small clamps that secure the kumiko to the jig while you fit and glue.7
-
Glue brush刷毛 · hakeFind on Amazon
A soft brush lays a thin, even film of starch glue along the kumiko.8
-
Craft knife & steel straightedgeFind on Amazon
For cutting the paper and trimming it flush after it's laid on the kumiko.4
-
Water atomizerFind on Amazon
A fine mist shrinks and tightens the washi drum-flat once it's glued down.4
Wood, paper & glue
Three consumables carry the whole screen. The manual is deliberately un-prescriptive about species — what matters are the properties.3
Timber
Stable, properly seasoned, with a straight, tight grain and no blemishes. Softwoods are easier to work; hardwoods are effective too. If you intend to finish straight off the plane, pick a species that planes cleanly.3
Find on AmazonShoji paper 和紙 · washi
Washi is Japanese hand-made paper; it's what fills the room with that soft, diffused light.9 Modern rolled shoji paper (and tougher laminated types) trim and glue the same way.
Find on AmazonStarch glue
For fixing the paper, any starch glue will suffice — a traditional wheat- or rice-starch paste keeps it reversible for re-papering later.8
Find on AmazonHammer 玄能 · gennō
A light ~150 g gennō sets the plane blade and taps kumiko home; a heavier one drives joints. Any good hammer works.10
Find on AmazonLet the jig hold the angle.
The fastest way into clean kumiko isn't a better chisel — it's a jig that makes the cut repeatable. Dial one to your stock, or browse the printed set.
Customize a jigWhere this comes from.
The tool and material guidance on this page is drawn from Des King's Shoji and Kumiko Design — Book 1: The Basics. The page and figure numbers in the references further down point to it, so you can trace any claim. If you want to go deeper, these are the books worth owning:
-
Shoji and Kumiko Design — Book 1: The BasicsFind on Amazon
The book this guide cites — shoji history, the full tool kit, timber selection, and a standard shoji built from scratch.
-
Shoji and Kumiko Design — Book 2Find on Amazon
The next step: variation (kawari-gumi) and tateshige shoji, plus the izutsu- and kaku-tsunagi kumiko pattern families.
-
Shoji and Kumiko Design — Book 3Find on Amazon
Open-centre (naka-nuki) shoji and the intricate shokkō and soroban patterns — with an appendix of the cutting jigs.
-
The Art of KumikoFind on Amazon
A modern, design-forward approach — ten infill patterns and decorative panels, beautifully photographed (Blue Hills Press).
Page & figure references, all to Book 1: The Basics:
- Kumiko defined as the thin wood pieces forming the lattice in shoji; the standard English term. — Types & Characteristics / Shoji anatomy, p. 5; Glossary, p. 141.
- Origins: Nara-period timber kumiko-lattice partitions, and the late-Heian introduction of thin translucent paper that gave birth to the shoji. — Brief History of Shoji, p. 3.
- Timber should be stable, seasoned, straight and tight-grained; softwoods are easier, hardwoods effective; shoji are traditionally hand-plane finished with no sanding or varnish. — Preparing the Timber (Milling), p. 24.
- Full tool list — Layout, Gennō, Kanna (planes), Nokogiri (saws), Chisels, Miscellaneous; Japanese tools are not essential if you own good Western ones. — Tools, pp. 16–18 (Figs 16–19).
- Two tools the author marks (with an asterisk) as worth buying in the Japanese version for accuracy: the kakumen-ganna (chamfer plane) and the fine-tooth cross-cut dōzuki saw used to cut kumiko joints. — Tools, pp. 16–17.
- Dōzuki: a Japanese saw with a firm metal spine that stiffens the blade for a fine cut. — Glossary, p. 140.
- Ōire nomi (butt chisels, 3/6/9/19 mm) and the non-essential sokosarai nomi; small clamps (hatagane) secure the kumiko to the kumiko jig. — Tools, p. 18; Glossary, pp. 142–143.
- Shoji glue: any starch glue will suffice. — Tools (Miscellaneous), p. 18.
- Washi: Japanese hand-made paper. — Glossary, p. 143.
- Gennō (Japanese hammer), kanna (Japanese plane), kebiki (Japanese marking gauge), hatagane (clamp). — Glossary, pp. 140–141.